Gel nail extension is the most famous and trendy nail art. It is because this art provides long-lasting and better results. However, at a point, you need to maintain your beautiful nails. Here, you need to know how to remove gel nail extensions. This step is necessary to prevent damage to nails. Also, it provides a smooth look to your nails.
This guide will help you to know the steps of removing gel nail extensions, whether you want to remove yourself or get professional help. However, these steps will help you to maintain your nails with gentle removal. Don’t wait, and welcome fresh and new nails by visiting Nail Concept.
How to Remove Gel Nail Extension at Home?
Most of the girls are a bit worried when it comes to removing their gel nail extensions at home. Whether you are a DIY enthusiast or want to refresh your nails without visiting a salon, this guide will give you an understanding of techniques. Moreover, you can get a hassle-free and smooth removal process. Say bye to damaged or overgrown extensions. Say welcome to fresh and natural nails.
Step 1: Gather Your Supplies
Before starting the gel nail extension removal process, gather some supplies such as:
- Acetone
- Aluminum foil squares
- Cotton balls or pads
- Nail file
- Wooden cuticle stick
- Nail buffer
- Cuticle oil
- Moisturizing hand cream
Step 2: Prepare Your Workspace
After gathering all supplies, prepare the workspace. Choose the ventilated area and cover it using a towel to avoid catching spills. Make sure to choose the area where proper lighting may reach.
Step 3: File the Extensions
After preparing the area, start filling gel nail extensions. During this step, seals will break, and acetone will penetrate the gel. Make sure to use a mild and 180 grit nail file. It is necessary to avoid any damage to natural nails.
Step 4: Soak the Cotton Balls
How to remove gel nail extensions at home? After filling, take cotton balls and dip them in acetone. The ball should be large enough to completely cover nail extensions.
Step 5: Wrap Your Nails
Now, put an acetone-dipped cotton ball on top of each extension. Then, use an aluminum foil to wrap around each extension to keep the cotton pad in place. Make sure to completely cover the extension and ensure its connection with the nail surface.
Step 6: Wait Patiently
Once you cover the nails with acetone-dipped cotton balls and aluminum foil, wait for 15 minutes to allow acetone to soften and dissolve extension.
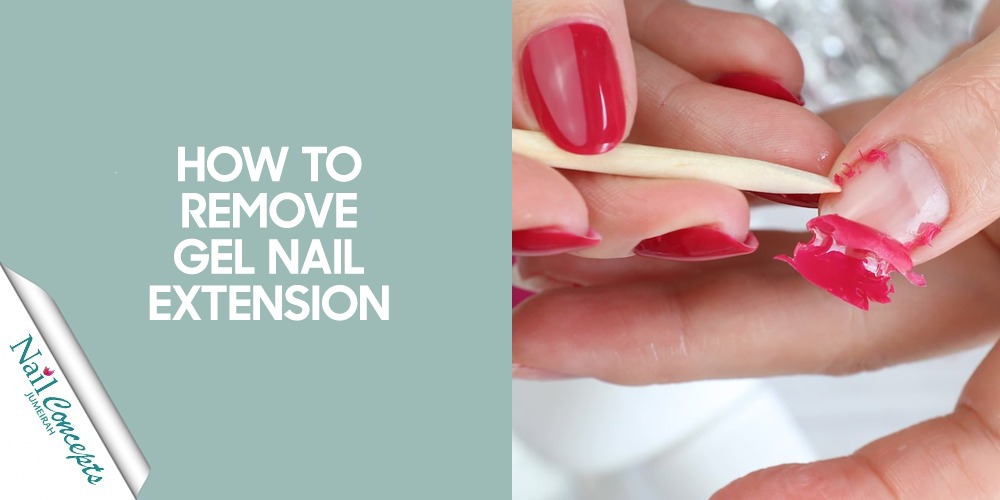
Step 7: Gently Remove Gel Extensions
After 15-20 minutes, unwrap your nails. Then, check the condition of the gel extension. At this point, use a wooden stick to push soft gel from nails. Never apply much force because it will damage nails.
Step 8: Buff and Moisturize
After the removal of the gel extension, use a buffer. This will soothe nails and remove any residue. Make sure to apply it gently to avoid natural nail damage. Moreover, apply cuticle oil to enhance the growth of nails.
Conclusion:
We have gone through step by step guide on how to remove gel nail extensions at home. However, gel nail extensions have earned fame in nail art. The reason is the stunning and durable look these extensions provide. Not only this, the extensions can enhance the elegance of nails for any occasion. Now, you don’t need to buy expensive machines and tools to remove your nail gel extensions.
No matter whether your nail extension gives your nails a shiny look. Moreover, You always need to maintain it to prevent any damage. For this, you need to know safe and effective ways. All the above steps will help you to remove extensions without harming natural nails.
This way, you can enhance the health and beauty of your nails. Also, this guide will encourage you to care for your nails with confidence, whether you want to try it yourself or get professional help. These steps are essential for damage-free gel nail extension removal. For more help, you can contact Nail Concept!